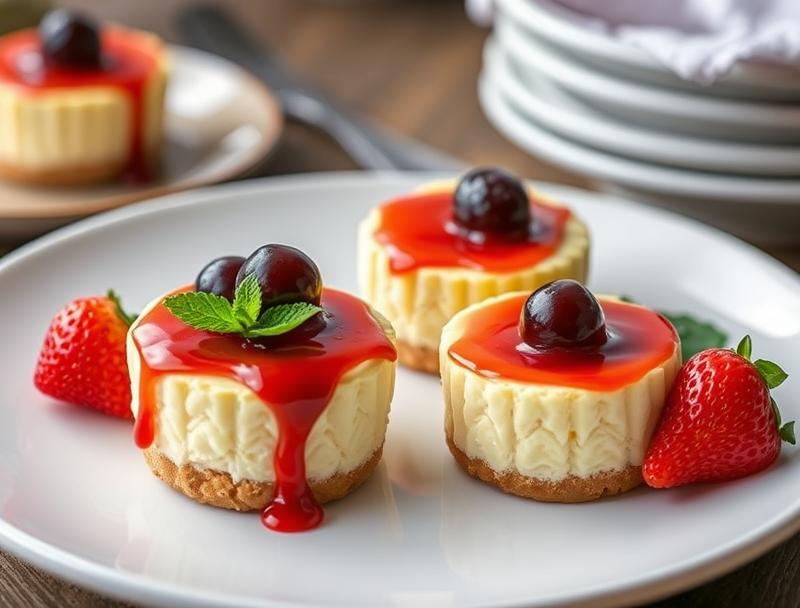
Mini Cheesecakes Recipe
Introduction
Indulge in the rich flavors and creamy textures of mini cheesecakes, perfectly sized for any occasion. With everyday ingredients and a straightforward preparation process, these bite-sized treats are as easy to make as they are delightful to eat. Whether you’re a seasoned baker or a beginner in the kitchen, this mini cheesecakes recipe is sure to impress with its balance of flavors and simplicity. The best part? You can customize them with your favorite toppings or flavor combinations, making each batch a unique culinary adventure.
Why This Works
- Flavor balance and ingredient accessibility: The combination of a graham cracker crust, creamy cheesecake filling, and the sweetness of the toppings creates a perfect harmony of flavors. Moreover, the ingredients are easily found in most grocery stores, making this recipe highly accessible.
- Ease of preparation: Despite their elegant appearance, mini cheesecakes are surprisingly easy to prepare. The steps are straightforward, and the baking time is relatively short, making them a great option for both novice and experienced bakers.
- Impressive results with minimal effort: One of the most appealing aspects of this recipe is the impressive presentation of the final product, considering the minimal effort required. Perfect for parties, gatherings, or as a special treat, these mini cheesecakes are sure to be a hit.
Ingredients
- 1 1/2 cups graham cracker crumbs
- 1/4 cup granulated sugar
- 6 tablespoons (3/4 stick) unsalted butter, melted
- 12 ounces cream cheese, softened
- 1/2 cup granulated sugar
- 2 large eggs
- 1 teaspoon vanilla extract
- Salt to taste
- Toppings of your choice (e.g., fresh fruits, chocolate shavings, caramel sauce)
Instructions
- Step 1: Prepare the Crust – Preheat your oven to 325°F (165°C). In a medium bowl, mix together the graham cracker crumbs, sugar, and melted butter until well combined. Press about 1 tablespoon of the mixture into the bottom of each mini muffin tin. Bake for 5 minutes, then let cool completely.
- Step 2: Prepare the Cheesecake Filling – In a large bowl, beat the cream cheese until smooth. Add the granulated sugar and beat until combined. Beat in the eggs one at a time, followed by the vanilla extract. Season with a pinch of salt to taste.
- Step 3: Fill and Bake the Cheesecakes – Pour the cheesecake batter into each muffin tin over the crust. Fill to about 3/4 of the way full. Bake for 15-18 minutes or until the edges are set and the centers are just slightly jiggly. Let cool completely in the pan.
- Step 4: Chill and Serve – Once cooled, refrigerate the cheesecakes for at least 4 hours. Just before serving, top with your desired fruits, sauces, or other toppings. Enjoy!
Handy Tips
- For a water bath, wrap the outside of the muffin tin with foil and place it in a larger baking dish. Fill the baking dish with hot water to about halfway up the sides of the muffin tin. This helps prevent cracking and ensures even baking.
- Don’t overmix the cheesecake batter, as this can lead to a dense cheesecake.
- Let the cheesecakes cool completely in the pan before refrigerating. This step is crucial for preventing cracking and ensuring the cheesecakes set properly.
Heat Control
Temperature control is crucial when baking cheesecakes. Ensure your oven is preheated to the correct temperature (325°F or 165°C) before baking. Overbaking can lead to dry, cracked cheesecakes, while underbaking might result in cheesecakes that are too soft or runny. The baking time may vary slightly depending on your oven and the size of your cheesecakes, so keep an eye on them after 12 minutes and check every minute thereafter until they are just set.
Crunch Factor
The crunch factor in mini cheesecakes comes from the graham cracker crust. To achieve a perfectly crunchy base without it becoming too hard, ensure you don’t overbake the crust. The initial 5 minutes of baking should give it a light golden color and a crunchy texture that complements the creamy cheesecake filling.
Pro Kitchen Tricks
- Use room temperature ingredients for a smoother cheesecake batter.
- Don’t open the oven door during the baking time, as this can cause the cheesecakes to sink or crack.
- For easier removal from the muffin tin, run a knife around the edges of each cheesecake before cooling.
Storage Tips
- Store the cheesecakes in an airtight container in the refrigerator for up to 5 days.
- For longer storage, cheesecakes can be frozen. Place them in a single layer in a freezer-safe bag or container and store for up to 2 months. Thaw frozen cheesecakes overnight in the refrigerator before serving.
- When reheating, do so gently to prevent cracking or breaking. A few seconds in the microwave or a short time at room temperature should suffice.
Gift Packaging Ideas
Mini cheesecakes are perfect for gifting, especially during holidays or special occasions. Consider packaging them in decorative muffin liners or placing them in a gift box lined with parchment paper. Adding a ribbon around the box and a personalized note can make the gift even more special. For a more rustic look, place the cheesecakes in mason jars and tie a ribbon around the lid. Whatever method you choose, the recipient is sure to appreciate the thought and deliciousness of your homemade mini cheesecakes.
Flavor Variations
- 🌟 Lemon or orange zest can add a beautiful citrus flavor to your cheesecakes.
- 🌟 Espresso or instant coffee can give your cheesecakes a mocha twist.
- 🌟 Fresh or dried fruits, nuts, or even candy pieces can be mixed into the batter for added texture and flavor.
Troubleshooting
- Texture problems: Overmixing can lead to dense cheesecakes, while underbaking can result in too soft or runny textures. Adjust your mixing and baking times accordingly.
- Ingredient replacements: If you’re looking to make your cheesecakes gluten-free, consider using gluten-free graham crackers or substituting with a gluten-free crust alternative.
- Over/undercooking signs: Keep an eye on your cheesecakes during the baking time. They should be just set and slightly jiggly in the center when done. Overcooked cheesecakes will be dry and possibly cracked.
FAQs
- Can I freeze it? Yes, mini cheesecakes can be frozen for up to 2 months. Freeze them in a single layer in a freezer-safe bag or container and thaw overnight in the refrigerator when you’re ready to serve.
- Is it gluten-free? The traditional recipe includes graham cracker crumbs, which contain gluten. However, you can easily make it gluten-free by substituting the crust with a gluten-free alternative.
- Can I double the recipe? Yes, the recipe can be doubled or even tripled if you’re serving a larger crowd. Just ensure you have enough muffin tins and adjust the baking time slightly if necessary.
Conclusion
Mini cheesecakes are a delightful treat that combines the simplicity of preparation with the elegance of presentation. Whether you’re a fan of classic cheesecake flavors or enjoy experimenting with new toppings and ingredients, this recipe offers a versatile base to explore your creativity. Don’t hesitate to share your mini cheesecakes with friends and family, and feel free to adapt the recipe to suit your dietary needs or preferences. With these tips, tricks, and variations, you’re well on your way to becoming a mini cheesecake master, ready to impress anyone with your baking skills.
Mini Cheesecakes Recipe
A recipe for mini cheesecakes that are easy to make and offer a perfect balance of flavors and textures.
🥘 Ingredients
👩🍳 Instructions
-
1Preheat oven to 325°F (165°C).
-
2Prepare the crust by mixing graham cracker crumbs, sugar, and melted butter. Press into muffin tins and bake for 5 minutes.
-
3Prepare the cheesecake filling by beating cream cheese, sugar, eggs, and vanilla extract. Pour over the crust and bake for 15-18 minutes.
-
4Let cool, then refrigerate for at least 4 hours. Top with desired toppings before serving.