Loaded Tater Tots Recipe
Introduction
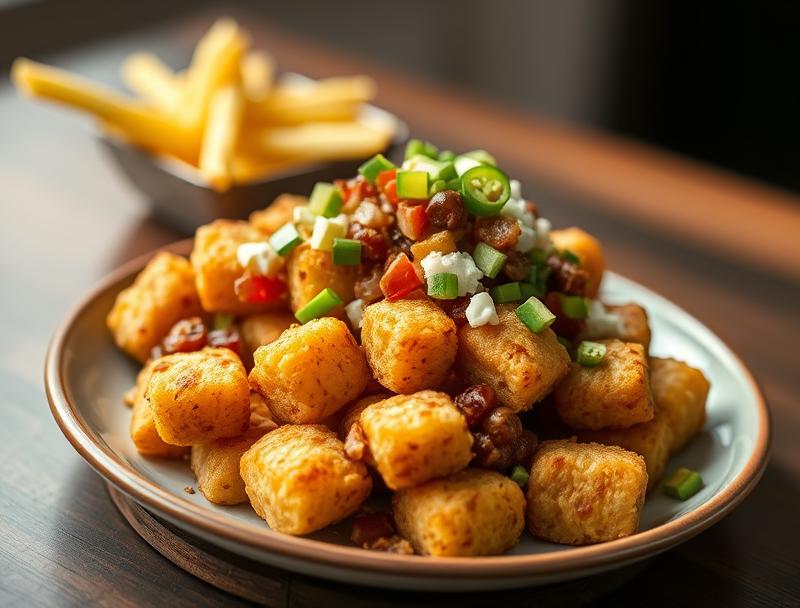
Imagine a dish that combines the comfort of crispy tater tots with the richness of loaded flavors, all achieved with everyday ingredients and minimal effort. This Loaded Tater Tots Recipe is a game-changer for anyone looking to elevate their snack or side dish game. It’s incredibly easy to make, bursting with flavor, and offers a canvas for creativity. Whether you’re a fan of spicy, cheesy, or smoky flavors, this recipe can be tailored to your taste preferences, making it a perfect addition to your culinary repertoire.
Why This Works
- Flavor balance and ingredient accessibility: The beauty of this recipe lies in its ability to balance a variety of flavors using ingredients that are readily available in most grocery stores.
- Ease of preparation: Despite its impressive outcome, the preparation and cooking process are straightforward and quick, making it perfect for busy days or when you need a dish in a hurry.
- Impressive results with minimal effort: The combination of crispy tater tots with loaded toppings creates a dish that’s not only delicious but also visually appealing, perfect for serving at gatherings or parties.
Key Ingredients
The main ingredients for this Loaded Tater Tots Recipe include tater tots, which can be store-bought or homemade, a variety of cheeses such as cheddar, mozzarella, and parmesan, diced meats like bacon or chorizo for added smokiness, sour cream or Greek yogurt for a tangy contrast, and a range of toppings like diced onions, tomatoes, jalapeños, and cilantro to add freshness and depth. Practical substitutions can include using different types of cheese, swapping bacon for ham or cooked sausage, and experimenting with various herbs and spices to customize the flavor profile.
Instructions
- Step 1: Begin by preheating your oven to 400°F (200°C). While the oven is heating up, prepare your toppings. Dice the bacon into small pieces and cook in a pan until crispy. Set aside. Chop the onions, tomatoes, and jalapeños into small pieces for later use.
- Step 2: Spread the tater tots out in a single layer on a baking sheet lined with parchment paper. Drizzle with a little bit of oil and sprinkle with salt. Bake in the preheated oven for about 20-25 minutes, or until they’re golden brown and crispy, flipping them halfway through the cooking time.
- Step 3: While the tater tots are baking, prepare the cheese sauce. In a saucepan, combine the cheddar, mozzarella, and parmesan cheese with a splash of milk. Heat over low heat, stirring constantly, until the cheese is melted and the sauce is smooth. Remove from heat and set aside.
- Step 4: Once the tater tots are done, remove them from the oven and let them cool for a few minutes. Transfer them to a serving dish or individual plates. Drizzle the cheese sauce over the tater tots, followed by a spoonful of sour cream or Greek yogurt, some diced onions, tomatoes, jalapeños, and finally, the crispy bacon bits. Garnish with cilantro and serve immediately.
Handy Tips
- For an extra crispy exterior on your tater tots, try soaking them in cold water for about 30 minutes before baking. This step helps remove excess starch, leading to a crunchier finish.
- Experiment with different seasonings and spices to add unique flavors to your tater tots before baking. Garlic powder, paprika, and chili powder are great options to start with.
- When melting the cheese sauce, be careful not to overheated it, as it can quickly become too thick and sticky. Adding a little more milk can help achieve the perfect consistency.
Heat Control
For this recipe, heat control is crucial, especially when baking the tater tots and melting the cheese sauce. The ideal temperature for baking tater tots is 400°F (200°C), and they should be cooked for about 20-25 minutes, or until they’re golden brown and crispy. When melting the cheese, use low heat and stir constantly to prevent the cheese from burning or becoming too thick. Signs of doneness for the tater tots include a golden brown color and a crispy texture, while the cheese sauce should be smooth and creamy.
Crunch Factor
Achieving the perfect crunch factor in this Loaded Tater Tots Recipe is key to its success. The tater tots should be crispy on the outside and fluffy on the inside. To enhance crunchiness, ensure that the tater tots are spread out in a single layer on the baking sheet and are not overcrowded, which can prevent even cooking. Additionally, soaking the tater tots in cold water before baking and using the right amount of oil can also contribute to a crunchier exterior.
Pro Kitchen Tricks
- For easier cleanup, line your baking sheet with parchment paper before spreading out the tater tots. This trick also helps prevent the tater tots from sticking to the sheet.
- To keep your tater tots warm while you’re preparing the toppings, place them in a low-temperature oven (around 200°F or 90°C) for a few minutes. This will help maintain their crunchiness without overcooking them.
- Consider using a thermometer to ensure your cheese sauce reaches the perfect melting point. This can help you achieve a smooth and creamy texture without overheating the cheese.
Storage Tips
- Leftover tater tots can be stored in an airtight container in the refrigerator for up to 3 days. To reheat, simply place them in the oven at 350°F (180°C) for a few minutes until crispy again.
- The cheese sauce can also be made ahead and stored in the fridge for up to 2 days. Reheat it gently over low heat, whisking constantly, until smooth and warm.
- For the best results, it’s recommended to assemble the loaded tater tots just before serving, as the toppings can make the tater tots soggy if left for too long.
Gift Packaging Ideas
If you’re considering gifting this Loaded Tater Tots Recipe, especially for parties or events, there are several creative packaging ideas you can explore. One option is to package the tater tots in small, decorative baskets or containers and serve them in individual portions. You can also offer a variety of toppings in small jars or containers, allowing each guest to customize their own loaded tater tots. Adding a personal touch, such as a handwritten note or a sprinkle of fresh herbs, can make the gift even more special and thoughtful.
Flavor Variations
- 🌟 Different spices: Experiment with various spices like cumin, smoked paprika, or garlic powder to add unique flavors to your tater tots.
- 🌟 Creative toppings: Consider adding some creativity to your toppings with items like diced ham, cooked sausage, roasted vegetables, or a dollop of salsa.
- 🌟 Ingredient swaps: Don’t be afraid to swap out ingredients to suit your dietary preferences or restrictions. For example, you can use vegan cheese or gluten-free seasonings to make the dish more inclusive.
Troubleshooting
- Texture problems: If your tater tots turn out too soggy, it might be because they were overcrowded on the baking sheet or not cooked at the right temperature. Adjusting the cooking time and ensuring they have enough space can help achieve the perfect texture.
- Ingredient replacements: If you’re missing an ingredient, don’t hesitate to get creative with substitutions. For example, you can use different types of cheese or meats to still achieve a delicious flavor profile.
- Over/undercooking signs: Keep an eye on your tater tots while they’re baking, as overcooking can make them too crispy and undercooking can leave them soggy. The cheese sauce should also be monitored to prevent it from becoming too thick or burnt.
FAQs
- Can I freeze it? Yes, you can freeze the tater tots before baking. Simply spread them out on a baking sheet, freeze until solid, and then transfer them to a freezer-safe bag or container for up to 3 months. Bake frozen tater tots for an additional 5-10 minutes, or until crispy.
- Is it gluten-free? Depending on the brand of tater tots you use, this recipe can be gluten-free. Always check the ingredients of the tater tots and any store-bought toppings to ensure they align with gluten-free dietary needs.
- Can I double the recipe? Absolutely! This recipe can easily be doubled or tripled to serve larger crowds. Just ensure you have enough baking sheets and ingredients to accommodate the increased quantity.
Conclusion
This Loaded Tater Tots Recipe is a versatile and delicious dish that can be enjoyed in various settings, from casual gatherings to more formal events. Its ease of preparation, customization options, and impressive presentation make it a standout choice for anyone looking to elevate their culinary game. Feel free to experiment with different flavors and toppings to make the recipe your own, and don’t hesitate to share your creations with friends and family. With its perfect balance of crunch, flavor, and creativity, this Loaded Tater Tots Recipe is sure to become a favorite in your household.
Loaded Tater Tots Recipe
A delicious and easy-to-make recipe for loaded tater tots, perfect for snacking or as a side dish, loaded with cheese, bacon, and your favorite toppings.
🥘 Ingredients
👩🍳 Instructions
-
1Preheat the oven to 400°F (200°C).
-
2Bake the tater tots for 20-25 minutes, or until golden brown and crispy.
-
3Prepare the cheese sauce by melting the cheddar, mozzarella, and parmesan cheese in a saucepan over low heat.
-
4Assemble the loaded tater tots by drizzling the cheese sauce over the baked tater tots, followed by a spoonful of sour cream or Greek yogurt, and topping with diced onions, tomatoes, jalapeños, crispy bacon, and chopped cilantro.