Lemon and Garlic Roast Chicken
Introduction
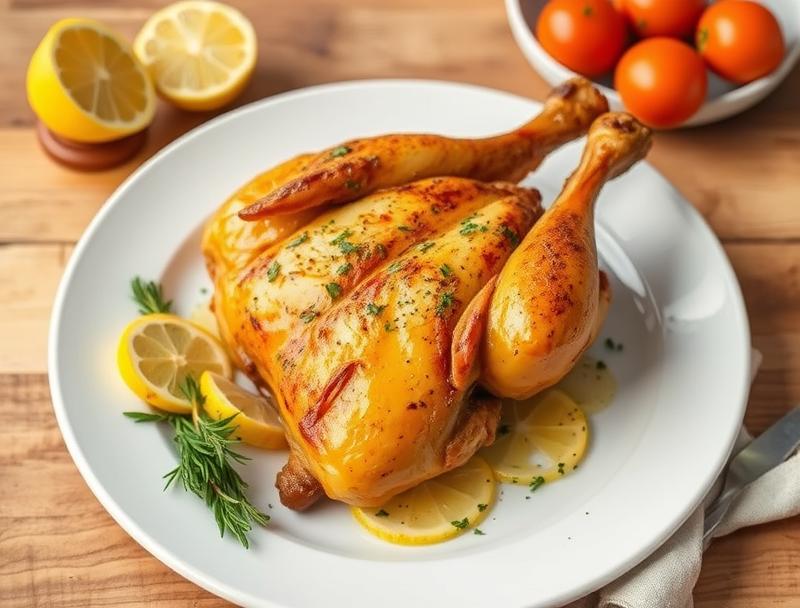
Imagine a dish so divine, it becomes the centerpiece of your family gatherings and special occasions. The Lemon and Garlic Roast Chicken is a masterpiece of simplicity, combining the brightness of lemon, the depth of garlic, and the richness of a perfectly roasted chicken. This recipe is a testament to the power of everyday ingredients, transformed by a little creativity and love into a culinary experience that will leave everyone wanting more. The beauty of this dish lies in its ease of preparation, making it accessible to cooks of all levels, from beginners to seasoned chefs. Whether you’re looking to impress your guests or simply enjoy a delicious meal with your loved ones, the Lemon and Garlic Roast Chicken is sure to become a favorite.
Why This Works
- Flavor balance and ingredient accessibility: The combination of lemon and garlic creates a harmonious balance of flavors that complements the chicken perfectly, and the best part is that these ingredients are readily available in most kitchens.
- Ease of preparation: Despite its impressive outcome, this recipe requires minimal effort, making it perfect for busy days or special occasions when you want to make a great impression without spending hours in the kitchen.
- Impressive results with minimal effort: The end result is a beautifully roasted chicken with a crispy skin and juicy meat, infused with the aromatic flavors of lemon and garlic, sure to impress anyone who takes a bite.
Ingredients
- 1 whole chicken (about 4 lbs), rinsed and patted dry
- 4 cloves of garlic, minced
- 2 lemons, juiced (about 1/4 cup), and 1 lemon cut into wedges for serving
- 2 tablespoons olive oil
- 2 teaspoons dried thyme
- 1 teaspoon salt
- 1/2 teaspoon black pepper
- 1/4 teaspoon paprika
- Fresh parsley, chopped (for garnish)
Instructions
- Step 1: Preparation – Preheat your oven to 425°F (220°C). In a small bowl, mix together minced garlic, lemon juice, olive oil, thyme, salt, black pepper, and paprika.
- Step 2: Seasoning the Chicken – Rub the garlic and lemon mixture all over the chicken, making sure to get some under the skin as well.
- Step 3: Roasting the Chicken – Place the chicken in a roasting pan and put it in the oven. Roast for about 45-50 minutes, or until the chicken is cooked through and the skin is golden brown and crispy.
- Step 4: Final Touches – Once the chicken is done, let it rest for 10-15 minutes before carving. Serve with lemon wedges on the side and garnish with chopped parsley.
Handy Tips
- For an extra crispy skin, pat the chicken dry with paper towels before applying the garlic and lemon mixture, and make sure the oven is at the right temperature before roasting.
- Don’t overcrowd the roasting pan, as this can affect air circulation and prevent the skin from crisping up properly.
- Let the chicken rest before carving to allow the juices to redistribute, making the meat more tender and juicy.
Heat Control
To achieve the perfect roast, it’s crucial to control the heat. The oven should be preheated to 425°F (220°C) to ensure a good crisp on the skin. Roasting time may vary depending on the size of the chicken, so it’s essential to check for doneness. The chicken is done when it reaches an internal temperature of 165°F (74°C), and the juices run clear when the thigh is pierced with a fork.
Crunch Factor
Achieving the perfect crunch on the chicken skin is a balance of preparation and cooking technique. Ensuring the chicken is dry before applying the seasoning mixture and roasting it in a hot oven helps to crisp up the skin. Additionally, not overcrowding the roasting pan allows for better air circulation, contributing to a crisper finish.
Pro Kitchen Tricks
- Using a cast-iron skillet or a heavy roasting pan can help distribute the heat evenly and contribute to a crisper skin.
- Tent the chicken with foil if the skin starts to brown too quickly to prevent burning.
- For easier cleanup, line the roasting pan with aluminum foil or parchment paper before adding the chicken.
Storage Tips
- Leftover chicken can be stored in the refrigerator for up to 3 days. It’s best to carve the chicken before storing it to make reheating easier.
- Reheat the chicken in the oven at 350°F (180°C) until warmed through. You can also use the microwave, but be cautious not to overheat, which can make the chicken dry.
- For longer storage, the chicken can be frozen for up to 4 months. It’s best to freeze it in airtight, freezer-safe bags or containers to preserve freshness.
Gift Packaging Ideas
If you’re considering gifting this dish, perhaps for a potluck or as part of a meal train, consider packaging it in a decorative tin or a microwave-safe container. Add a few fresh herbs like parsley or thyme on top for a pop of color, and include a side of roasted vegetables or a salad for a complete meal. Don’t forget to include reheating instructions to ensure the recipient enjoys the dish at its best.
Flavor Variations
- 🌟 Add some heat with red pepper flakes or sliced jalapeños for a spicy kick.
- 🌟 Experiment with different herbs like rosemary, sage, or oregano for unique flavor profiles.
- 🌟 Swap the lemon with lime or orange for a different citrus twist.
Troubleshooting
- Texture problems: If the chicken skin doesn’t crisp up, check the oven temperature and ensure the chicken wasn’t overcrowded in the pan. For dry meat, make sure not to overcook the chicken, and let it rest before carving.
- Ingredient replacements: If you don’t have lemons, you can substitute with limes or oranges, though the flavor will be slightly different. For garlic, you can use garlic powder as a substitute, but use it sparingly as it can be quite potent.
- Over/undercooking signs: The chicken is undercooked if the juices are pinkish and the internal temperature is below 165°F (74°C). It’s overcooked if the meat is dry and the skin is too dark or burnt.
FAQs
- Can I freeze it? Yes, you can freeze the cooked chicken for up to 4 months. It’s best to freeze it in airtight, freezer-safe bags or containers.
- Is it gluten-free? Yes, this recipe is gluten-free, making it suitable for those with gluten intolerance or preference.
- Can I double the recipe? Yes, you can easily double or triple this recipe for larger gatherings. Just ensure you have enough space in your roasting pan for the chickens to roast evenly.
Conclusion
The Lemon and Garlic Roast Chicken is more than just a recipe; it’s an experience waiting to happen. With its blend of citrus and savory flavors, it’s sure to delight both kids and adults alike. Whether you’re a seasoned cook or just starting out, this dish is a great addition to your repertoire, offering a delicious, stress-free meal option for any day of the week. Feel free to experiment with the recipe, adding your own twist to make it a family favorite. And don’t forget to share your creations and tips with friends and family, spreading the joy of cooking and the love of good food.
Lemon and Garlic Roast Chicken
A delicious and easy-to-make roast chicken recipe infused with the brightness of lemon and the depth of garlic, perfect for special occasions or everyday meals.
🥘 Ingredients
👩🍳 Instructions
-
1Preheat the oven to 425°F (220°C).
-
2Mix together garlic, lemon juice, olive oil, thyme, salt, black pepper, and paprika.
-
3Rub the garlic and lemon mixture all over the chicken and roast in the oven for 45-50 minutes, or until cooked through.
-
4Let the chicken rest for 10-15 minutes before carving and serving.