Easy Baked Pears Recipe
Introduction
Welcome to the simplest and most delectable dessert recipe you’ll ever try: Easy Baked Pears. This dish is a masterclass in elegance and ease, requiring just a few everyday ingredients to create a truly impressive and flavorful dessert. The beauty of baked pears lies in their versatility – they can be served warm or chilled, making them perfect for any season. Whether you’re looking for a quick dessert to impress your dinner guests or a healthy snack for your family, this recipe has you covered. With its perfect balance of sweet and savory, and the added bonus of being incredibly easy to prepare, you’ll find yourself returning to this recipe time and time again.
Why This Works
- The flavor balance in this recipe is impeccable, combining the natural sweetness of pears with a hint of spice and the richness of butter, all of which are easily accessible ingredients.
- The preparation is remarkably easy, requiring minimal effort and time, making it perfect for busy evenings or special occasions when you want to impress without stressing.
- Despite its simplicity, the dish yields impressive results, with the pears transforming into a tender, caramelized delight that’s sure to wow your family and friends.
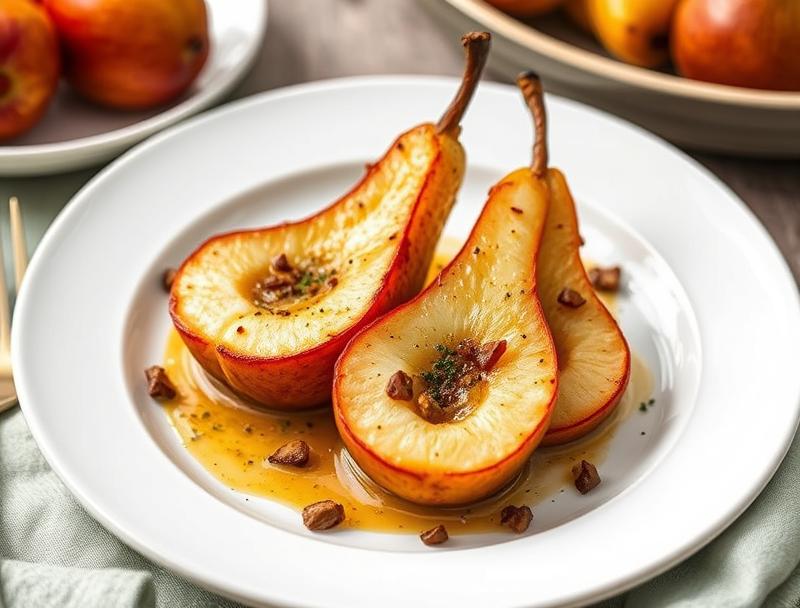
Ingredients
- 4 ripe but firm pears (any variety, though Bartlett or Anjou work well)
- 2 tablespoons honey
- 1 tablespoon brown sugar
- 1/2 teaspoon ground cinnamon
- 1/4 teaspoon ground nutmeg
- 1/4 teaspoon salt
- 2 tablespoons unsalted butter, melted
- 1/4 cup white wine (optional, can be substituted with apple cider or water)
- Fresh thyme or rosemary leaves for garnish (optional)
Instructions
- Step 1: Preheat your oven to 375°F (190°C). While the oven is heating up, prepare your pears by washing them gently, then halving and coring them. You can leave the skins on for extra texture and flavor.
- Step 2: In a small bowl, mix together the honey, brown sugar, cinnamon, nutmeg, and salt until well combined. Brush the melted butter onto the cut side of each pear half, then sprinkle the honey and spice mixture evenly over the pears.
- Step 3: Place the pear halves in a baking dish, cut side up. If using, pour the white wine or substitute around the pears to create a moist environment. Cover the dish with aluminum foil and bake for about 25 minutes, or until the pears start to tenderize.
- Step 4: Remove the foil and continue baking for an additional 20-25 minutes, or until the pears are tender when pierced with a fork and caramelized on top. Remove from the oven and let cool slightly. Serve warm, garnished with fresh herbs if desired, or let cool completely and refrigerate or freeze for later use.
Handy Tips
- For an extra caramelized top, broil the pears for 2-3 minutes after removing the foil, watching carefully to prevent burning.
- Consider using different spices like ginger or allspice to give your pears a unique flavor profile.
- If your pears are overly ripe, they might become too soft during baking. Look for pears that are firm but yield slightly to pressure.
Heat Control
Maintaining the right oven temperature is crucial for achieving the perfect tenderness and caramelization. Ensure your oven is at 375°F (190°C) for the initial baking, and adjust the time based on your pears’ ripeness and size. For the broiling step, keep a close eye to avoid burning, as the top can quickly go from perfectly caramelized to burnt.
Crunch Factor
The texture of baked pears is all about achieving a tender interior while maintaining some crunch from the caramelized top or the pear’s natural texture. To enhance the crunch factor, consider adding some chopped nuts (like almonds or walnuts) on top of the pears before the final baking step, or serve with a crunchy element like biscotti on the side.
Pro Kitchen Tricks
- To expedite the ripening process of pears, place them in a paper bag with an apple. The ethylene gas produced by the apple will help ripen the pears faster.
- For easier cleanup, line your baking dish with parchment paper before adding the pears and liquid.
- Experiment with different types of sugar or honey for unique flavor profiles. For instance, using maple syrup can add a rich, earthy flavor to your pears.
Storage Tips
- Baked pears can be stored in the refrigerator for up to 3 days. Let them cool completely before refrigerating.
- For longer storage, baked pears can be frozen for up to 3 months. Place them in an airtight container or freezer bag, making sure to press out as much air as possible before sealing.
- To reheat, simply place the desired number of pear halves in the oven at 300°F (150°C) for about 10-15 minutes, or until warmed through.
Gift Packaging Ideas
Baked pears make a thoughtful and unique gift, especially when presented nicely. Consider placing a couple of cooled pear halves in decorative jars, topping them with a drizzle of honey and a sprinkle of cinnamon, and sealing the jar with a ribbon and gift tag. Alternatively, wrap individual pear halves in plastic wrap or aluminum foil and place them in a gift basket filled with other gourmet goodies like artisanal cheeses, crackers, and jams.
Flavor Variations
- Spice it up: Add a pinch of cayenne pepper or red pepper flakes for a spicy kick.
- Sweet and savory: Mix some crumbled blue cheese or feta into the honey and spice mixture for a tangy contrast.
- Fruity twist: Replace some of the honey with fruit preserves, like apricot or quince, for added depth of flavor.
Troubleshooting
- Texture issues: If your pears are too soft, they might have been overripe to start with. If they’re not tender enough, they might need a bit more baking time.
- Ingredient substitutions: While the recipe is quite forgiving, substituting the pears with another fruit like apples will change the cooking time and possibly the spice blend needed.
- Over/undercooking signs: Keep an eye on your pears; they should be tender when pierced with a fork. Overcooking will result in mushy pears, while undercooking will leave them too firm.
FAQs
- Can I freeze it? Yes, baked pears can be frozen for up to 3 months. Simply cool them completely, then place them in an airtight container or freezer bag.
- Is it gluten-free? Yes, this recipe is naturally gluten-free, making it a great option for those with gluten intolerance or sensitivity.
- Can I double the recipe? Absolutely. Simply double all the ingredients and adjust the baking time slightly, as a larger quantity of pears might take a bit longer to cook through.
Conclusion
The Easy Baked Pears Recipe is a testament to the magic that happens in the kitchen when simple, high-quality ingredients meet thoughtful preparation. Whether you’re a seasoned chef or a beginner cook, this recipe is sure to become a staple in your household. Feel free to experiment with different spices, toppings, and presentation ideas to make it your own. And don’t hesitate to share your creations and adaptations with friends and family – the joy of cooking is in the sharing, after all. Happy baking, and bon appétit!
Easy Baked Pears Recipe
A simple and delicious dessert made by baking pears with honey, sugar, and spices, perfect for any occasion.
🥘 Ingredients
👩🍳 Instructions
-
1Preheat the oven to 375°F (190°C).
-
2Prepare the pears by washing, halving, and coring them.
-
3Mix the honey, brown sugar, cinnamon, nutmeg, and salt. Brush the melted butter onto the pears, then sprinkle the honey and spice mixture evenly over them.
-
4Bake the pears covered with foil for 25 minutes, then uncovered for an additional 20-25 minutes, or until tender and caramelized.