Easy Baked Pears Recipe
Introduction
Indulge in the sweetness of the season with our Easy Baked Pears Recipe, a dish that embodies the perfect blend of ease, flavor, and creativity. Using everyday ingredients, this recipe transforms simple pears into a culinary masterpiece that’s as impressive as it is delicious. Whether you’re a seasoned chef or a beginner in the kitchen, this recipe is sure to delight your taste buds and leave you wanting more. The beauty of baked pears lies in their versatility – they can be served as a dessert, a side dish, or even as a topping for yogurt or oatmeal, making them a perfect addition to any meal.
Why This Works
- The balance of flavors in this recipe, combining the natural sweetness of pears with the warmth of spices, creates a truly irresistible taste experience. The accessibility of the ingredients means that anyone can make this dish, regardless of their location or the season.
- The ease of preparation is a significant advantage, requiring minimal effort for maximum reward. This makes it an ideal choice for busy evenings or special occasions when you want to impress without stressing.
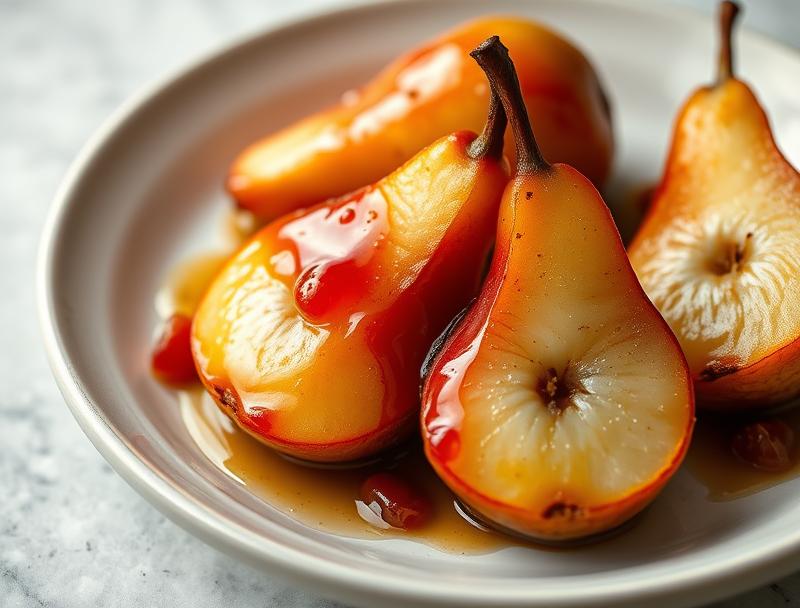
- Despite the simplicity of the recipe, the results are nothing short of impressive. The presentation of baked pears, with their caramelized skins and tender flesh, is sure to impress dinner guests or satisfy a personal craving for something sweet and comforting.
Ingredients
- 4 ripe but firm pears (any variety, though Bartlett or Anjou work well)
- 1/4 cup brown sugar
- 2 tablespoons honey
- 1 tablespoon freshly squeezed lemon juice
- 1/2 teaspoon ground cinnamon
- 1/4 teaspoon ground nutmeg
- 1/4 teaspoon salt
- 1/4 cup chopped walnuts or pecans (optional, for added crunch)
- 1 tablespoon unsalted butter, melted
- Whipped cream or vanilla ice cream, for serving (optional)
Instructions
- Step 1: Preparation – Preheat your oven to 375°F (190°C). Rinse the pears, then pat them dry with a paper towel. If using nuts, chop them finely and set aside.
- Step 2: Mixing the Spice Blend – In a small bowl, mix together the brown sugar, honey, lemon juice, cinnamon, nutmeg, and salt until well combined.
- Step 3: Preparing the Pears – Peel the pears, leaving the stems intact. If desired, use a melon baller to scoop out the cores from the bottom of the pears, being careful not to pierce the skin. Place the pears in a baking dish that allows them to sit upright.
- Step 4: Baking the Pears – Divide the sugar and spice mixture evenly among the pears, spooning it into the hollowed-out cores or simply spreading it over the tops if you didn’t core them. Drizzle the melted butter over the pears, making sure they’re all coated. If using nuts, sprinkle them over the top of each pear.
- Step 5: Final Touches – Bake the pears for about 25-30 minutes, or until they’re tender when pierced with a fork. The skin should be caramelized, and the flesh should be soft but still hold its shape. Remove the pears from the oven and let them cool slightly. Serve warm, topped with whipped cream or a scoop of vanilla ice cream if desired.
Handy Tips
- For an extra caramelized crust, increase the oven temperature to broil (high) for the last 2-3 minutes of baking. Keep a close eye to avoid burning.
- Consider using other spices like ginger, cardamom, or allspice to give your pears a unique flavor profile.
- If you’re looking for a lighter version, you can reduce the amount of sugar or substitute it with maple syrup for a deeper flavor.
Heat Control
Monitoring the heat is crucial when baking pears. The ideal temperature is 375°F (190°C), which provides a gentle heat that cooks the pears through without burning the sugar. Timing is also key; bake for 25-30 minutes, or until the pears are tender. Signs of doneness include a caramelized skin and tender flesh that yields to a fork.
Crunch Factor
Achieving the right texture is important for baked pears. The flesh should be tender, while the skin and any added nuts provide a satisfying crunch. To enhance the crunch factor, ensure that the pears are not overbaked, as this can make them too soft. The addition of chopped nuts also adds a pleasant textural element to the dish.
Pro Kitchen Tricks
- Use a variety of pear that holds its shape well when cooked, like Bartlett or Anjou, for the best results.
- Don’t overcrowd the baking dish, as this can prevent even cooking. If necessary, bake the pears in batches.
- For easier cleanup, line the baking dish with parchment paper before adding the pears and sugar mixture.
Storage Tips
- Baked pears can be stored in the refrigerator for up to 3 days. Let them cool completely before refrigerating.
- For longer storage, consider freezing the baked pears. Once cooled, place them in an airtight container or freezer bag, making sure to press out as much air as possible before sealing. Frozen pears can be thawed at room temperature or reheated in the oven or microwave.
- When reheating, a brief warm-up in the microwave or a few minutes in a low-temperature oven (around 300°F or 150°C) should suffice. Be careful not to overheat, as this can make the pears too soft.
Gift Packaging Ideas
Baked pears make a lovely gift, especially when presented in an attractive manner. Consider placing a cooled pear in a decorative jar or container, topping it with whipped cream or a sprinkle of cinnamon, and adding a ribbon or gift tag. For a more rustic look, wrap the pear in parchment paper and tie with twine. You can also package the pears in a beautiful basket or box, perfect for a housewarming gift or a sweet treat for a friend.
Flavor Variations
- Experiment with different spices like cinnamon sticks, cloves, or star anise for unique flavor profiles.
- Add a splash of liquor such as bourbon, rum, or Grand Marnier to the sugar mixture for an adult twist.
- Try using other types of sugar like turbinado or muscovado for a deeper, richer flavor.
Troubleshooting
- If the pears are too hard, they may not be ripe enough. Let them ripen at room temperature before baking.
- If the sugar mixture caramelizes too quickly, reduce the oven temperature or cover the pears with foil to prevent burning.
- If you notice the pears are becoming too soft, they may be overbaked. Check the pears frequently during the baking time to avoid this.
FAQs
- Can I freeze the pears before baking? Yes, but it’s best to bake them first. Freezing raw pears can make them too soft and watery after thawing.
- Is this recipe gluten-free? Yes, this recipe is naturally gluten-free, making it a great option for those with gluten intolerance or sensitivity.
- Can I double the recipe? Absolutely. Simply multiply all the ingredients by two and adjust the baking time as needed. Keep an eye on the pears to ensure they don’t overcook.
Conclusion
With its perfect balance of flavors and textures, our Easy Baked Pears Recipe is a must-try for anyone looking to elevate their dessert game. Whether you’re a fan of traditional desserts or prefer something lighter and fresher, this recipe is sure to please. Don’t be afraid to experiment with different spices and toppings to make it your own, and consider sharing your creations with friends and family. The joy of baking lies not just in the end result, but in the process itself – the measuring, the mixing, and the waiting. So go ahead, give this recipe a try, and enjoy the simple pleasures of baking and sharing delicious food.
Easy Baked Pears Recipe
A simple and delicious recipe for baked pears, perfect for dessert or as a side dish, featuring a blend of brown sugar, honey, and spices.
🥘 Ingredients
👩🍳 Instructions
-
1Preheat the oven to 375°F (190°C).
-
2Prepare the pears by peeling and coring them, if desired.
-
3Mix the sugar and spice blend, then fill the pears or spoon it over them.
-
4Bake the pears for 25-30 minutes, or until tender and caramelized.
-
5Serve warm, topped with whipped cream or vanilla ice cream if desired.