Easy Baked Pears Recipe
Introduction
Welcome to the world of effortless baking with our Easy Baked Pears Recipe, where simplicity meets flavor and creativity. This dish is perfect for anyone looking to impress their family and friends without spending hours in the kitchen. Using everyday ingredients, we’ll guide you through a journey of textures and tastes that will leave you wanting more. The beauty of baked pears lies in their versatility – they can be served as a dessert, a side dish, or even as a topping for your favorite yogurt or ice cream. So, let’s dive into the world of baked pears and discover how easy it is to create a masterpiece with minimal ingredients and effort.
Why This Works
- Flavor balance and ingredient accessibility: Our recipe combines the natural sweetness of pears with a hint of spice, creating a perfect balance of flavors that anyone can enjoy. The ingredients are easily accessible and probably already sitting in your pantry.
- Ease of preparation: The preparation time for this recipe is minimal, requiring just a few minutes of chopping and mixing. The rest of the magic happens in the oven, leaving you free to attend to other tasks or simply relax.
- Impressive results with minimal effort: Despite the simplicity of the recipe, the end result is nothing short of impressive. The pears come out tender, flavorful, and aromatic, making them a perfect dessert or snack for any occasion.
Ingredients
- 4 ripe but firm pears (any variety, but Bartlett or Anjou work well)
- 1/4 cup brown sugar
- 2 tablespoons honey
- 1 tablespoon freshly squeezed lemon juice
- 1/2 teaspoon ground cinnamon
- 1/4 teaspoon ground nutmeg
- 1/4 teaspoon salt
- 1/4 cup chopped walnuts or pecans (optional)
- 1 tablespoon unsalted butter, melted
Instructions
- Step 1: Preparation – Preheat your oven to 375°F (190°C). Wash the pears, cut them in half lengthwise, and scoop out the cores. Place the pears in a baking dish.
- Step 2: Mixing the Topping – In a small bowl, mix together the brown sugar, honey, lemon juice, cinnamon, nutmeg, and salt until well combined.
- Step 3: Adding the Topping – Divide the sugar and spice mixture evenly among the pear halves, spooning it into the hollowed-out cores. If using nuts, sprinkle them on top of the sugar mixture.
- Step 4: Baking – Drizzle the melted butter over the pears and cover the baking dish with aluminum foil. Bake for 25 minutes, then remove the foil and continue baking for an additional 20-25 minutes, or until the pears are tender when pierced with a fork.
Handy Tips
- Choose the right pears: While any pear variety can be used, firmer pears like Bartlett or Anjou hold their shape better during baking.
- Don’t overbake: Pears are done when they’re tender but still slightly firm. Overbaking can make them too soft and mushy.
- Experiment with spices: Feel free to adjust the amount of cinnamon, nutmeg, or add other spices like ginger or cardamom to suit your taste preferences.
Heat Control
Maintaining the right oven temperature is crucial for achieving perfectly baked pears. Ensure your oven is at 375°F (190°C) for the entire baking time. The initial 25 minutes with the foil covering helps to steam the pears, making them tender, while the remaining time without the foil slightly caramelizes the sugar on top.
Crunch Factor
The addition of chopped nuts like walnuts or pecans provides a delightful crunch to the soft, baked pears. If you prefer a crunchier topping, you can toast the nuts in a pan for a few minutes before sprinkling them on the pears.
Pro Kitchen Tricks
- Use a variety of pear types for a colorful presentation.
- For an extra caramelized top, broil the pears for 2-3 minutes after baking. Keep an eye on them to avoid burning.
- Let the pears cool slightly before serving. They’re delicious warm, at room temperature, or even chilled.
Storage Tips
- Baked pears can be stored in an airtight container in the refrigerator for up to 3 days.
- For longer storage, consider freezing the baked pears. Simply place them in a freezer-safe bag or container and store in the freezer for up to 2 months. Thaw frozen pears in the refrigerator or at room temperature when you’re ready to serve.
- Reheat chilled or frozen pears in the oven at 300°F (150°C) for about 10-15 minutes, or until warmed through.
Gift Packaging Ideas
Baked pears make a thoughtful and delicious gift, especially during the holidays. Consider packaging them in decorative jars or containers, topped with a sprinkle of cinnamon or a few nuts, and finished with a ribbon or gift tag. You can also include a card with the recipe and a personal message for a more heartfelt touch.
Flavor Variations
- Different spices: Try adding a pinch of ground ginger, cardamom, or cloves to the sugar mixture for unique flavor profiles.
- Creative toppings: In addition to nuts, consider using dried cranberries, chocolate chips, or even a dollop of whipped cream to top your baked pears.
- Ingredient swaps: Replace the brown sugar with maple syrup or honey for a different sweetness level. You can also use other types of fruit like apples or quince for a variation on the recipe.
Troubleshooting
- Texture problems: If your pears are too hard, they might not have been ripe enough. If they’re too soft, they might have been overbaked. Adjust the baking time based on the pear’s texture.
- Ingredient replacements: If you don’t have a particular spice or ingredient, feel free to substitute with something similar or omit it altogether. The recipe is quite forgiving.
- Over/undercooking signs: Pears are done when they’re tender but still hold their shape. If they’re undercooked, they’ll be hard in the center. If they’re overcooked, they’ll be mushy and might fall apart.
FAQs
- Can I freeze it? Yes, baked pears can be frozen for up to 2 months. Simply thaw and reheat when you’re ready to serve.
- Is it gluten-free? Yes, this recipe is naturally gluten-free, making it a great option for those with gluten intolerance or sensitivity.
- Can I double the recipe? Absolutely! Simply double all the ingredients and adjust the baking time slightly if necessary. Keep an eye on the pears to ensure they don’t overcook.
Conclusion
With our Easy Baked Pears Recipe, you’re just a step away from creating a delicious, comforting dessert that’s sure to please anyone. Whether you’re a seasoned baker or a beginner in the kitchen, this recipe is a must-try. Don’t be afraid to experiment with different spices, toppings, and ingredients to make the recipe your own. Share your creations with friends and family, and enjoy the warmth and joy that comes from sharing a homemade treat. Happy baking!
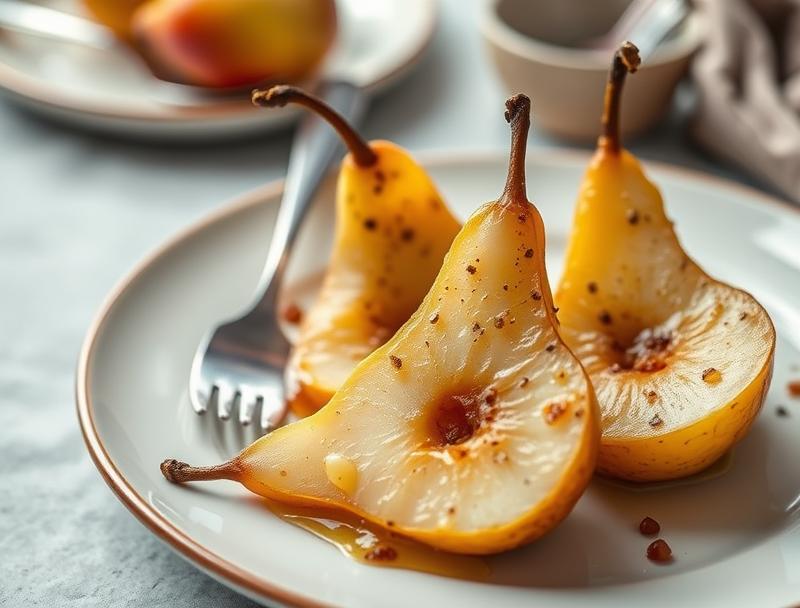
Easy Baked Pears Recipe
A simple and delicious recipe for baked pears, perfect as a dessert or snack, made with ripe pears, brown sugar, honey, and spices.
🥘 Ingredients
👩🍳 Instructions
-
1Preheat the oven to 375°F (190°C).
-
2Prepare the pears by washing, cutting in half, and scooping out the cores.
-
3Mix the sugar, honey, lemon juice, cinnamon, nutmeg, and salt in a bowl.
-
4Fill the pear halves with the sugar mixture and top with nuts if using.
-
5Bake the pears covered with foil for 25 minutes, then uncovered for an additional 20-25 minutes, or until tender.