Easy Baked Pears Recipe
Introduction
Welcome to the world of effortless desserts with our Easy Baked Pears Recipe. This dish is a masterclass in simplicity, requiring just a few everyday ingredients to create a truly impressive and delicious treat. The beauty of baked pears lies in their versatility and the ease with which they can be prepared, making them perfect for both special occasions and cozy nights in. With the combination of tender pears, a hint of cinnamon, and the warmth of baked goodness, this recipe is sure to become a favorite. It’s a testament to how a few quality ingredients can come together to create something truly special, all while minimizing fuss and maximizing flavor.
Why This Works
- The balance of flavors between the natural sweetness of the pears, the depth of cinnamon, and any additional spices creates a harmonious taste experience that is both comforting and refined.
- The accessibility of the ingredients means that anyone can make this dish, regardless of their location or the season. Pears are widely available, and the other ingredients are likely already in your pantry.
- The preparation is remarkably easy, requiring minimal effort for a dessert that looks and tastes like it was made by a professional. This makes it ideal for beginners or for those short on time.
Ingredients
- 4 ripe but firm pears (any variety, but firmer pears like Bartlett or Anjou work best)
- 1/4 cup honey
- 2 tablespoons brown sugar
- 1/2 teaspoon ground cinnamon
- 1/4 teaspoon ground nutmeg
- 1/4 teaspoon salt
- 1/4 cup water
- 1 tablespoon unsalted butter, melted
- Optional: vanilla extract, other spices like ginger or cardamom, and nuts or oats for topping
Instructions
- Step 1: Preheat your oven to 375°F (190°C). While the oven is heating up, prepare the pears by washing them gently, then halving them lengthwise and scooping out the cores.
- Step 2: In a bowl, mix together the honey, brown sugar, cinnamon, nutmeg, and salt until well combined. Add the melted butter and mix until you have a smooth, syrupy consistency. If using vanilla extract or other spices, add them now and mix well.
- Step 3: Place the pear halves in a baking dish, cut side up. Spoon the honey and spice mixture evenly over each pear half, making sure they’re all coated. Pour the water into the baking dish, around the pears, to create a bit of steam during baking.
- Step 4: Bake the pears for about 25-30 minutes, or until they’re tender when pierced with a fork. The exact baking time may vary depending on the pear variety and your desired level of tenderness. Remove the pears from the oven and let them cool slightly. If desired, sprinkle with nuts or oats before serving.
Handy Tips
- Choose pears that are ripe but still firm, as they will hold their shape better during baking. Overly ripe pears may become too soft and mushy.
- Don’t overbake. Pears should be tender but still retain some of their texture. If you prefer a softer pear, you can bake them for an additional 5-10 minutes, checking frequently to avoid overcooking.
- Experiment with different spices and toppings to find your favorite combinations. Cinnamon and nutmeg provide a classic flavor, but feel free to add or substitute with ginger, cardamom, or a sprinkle of citrus zest for variety.
Heat Control
For this recipe, maintaining the right oven temperature is crucial. Ensure your oven is at 375°F (190°C) for the entire baking time. The water in the baking dish helps to keep the pears moist and promotes even cooking. If you notice the tops of the pears starting to brown too quickly, you can cover the dish with aluminum foil for the remainder of the baking time.
Crunch Factor
The texture of baked pears should be tender, with a slight give when pressed. To achieve the perfect texture, monitor the baking time closely and adjust based on the pear variety and your personal preference. For an added crunch, consider topping the pears with chopped nuts or a sprinkle of oatmeal before or after baking.
Pro Kitchen Tricks
- To enhance the presentation, drizzle the pears with any remaining syrup from the baking dish after they’ve cooled slightly. This adds a glossy finish and makes the dish more appealing.
- For a professional touch, serve the baked pears with a dollop of whipped cream, vanilla ice cream, or a sprinkle of powdered sugar. This contrasts nicely with the warm, spiced pears.
- Consider baking the pears in individual ramekins for a more elegant, portion-controlled dessert. This also makes serving and storing any leftovers easier.
Storage Tips
- Baked pears can be stored in the refrigerator for up to 3 days. Let them cool completely before covering and refrigerating.
- To reheat, simply warm the pears in the oven at a low temperature (about 300°F or 150°C) for a few minutes, or until warmed through. You can also reheat them in the microwave, but be cautious of overheating.
- For longer storage, baked pears can be frozen. Place the cooled pears in an airtight container or freezer bag, making sure to press out as much air as possible before sealing. Frozen pears are best reheated in the oven to preserve texture.
Gift Packaging Ideas
If you’re considering gifting baked pears, they can be beautifully presented in decorative jars or containers, topped with a sprinkle of cinnamon or a few nuts. Wrap the jar in a ribbon or twine, and include a handwritten note with reheating instructions for a personal touch. For a more rustic look, place the cooled pears in a paper bag, seal the top with a twist tie, and attach a gift tag with a ribbon.
Flavor Variations
- Different spices: Try adding a pinch of ground ginger, cardamom, or a cinnamon stick to the baking dish for unique flavor profiles.
- Creative toppings: In addition to nuts and oats, consider topping your baked pears with a drizzle of caramel sauce, a sprinkle of sea salt, or a dollop of crème fraîche.
- Ingredient swaps: For a different twist, use other types of fruit like apples or peaches, adjusting the baking time as needed based on the fruit’s texture and density.
Troubleshooting
- Texture problems: If your pears become too soft, they were likely overbaked. For the next batch, reduce the baking time and check the pears more frequently.
- Ingredient replacements: If you’re missing a specific spice, feel free to substitute with similar spices or omit if necessary. The overall flavor will still be delicious.
- Over/undercooking signs: Undercooked pears will be firm and possibly crunchy, while overcooked pears will be soft and mushy. Aim for a tender but still slightly firm texture.
FAQs
- Can I freeze it? Yes, baked pears can be frozen for up to 3 months. Cool them completely, then place them in an airtight container or freezer bag, pressing out as much air as possible before sealing.
- Is it gluten-free? Yes, this recipe is naturally gluten-free, making it a great option for those with gluten intolerance or sensitivity.
- Can I double the recipe? Absolutely. Simply multiply all the ingredients by two and adjust the baking time slightly, as the pears may take a few minutes longer to cook through.
Conclusion
Our Easy Baked Pears Recipe is a versatile and delicious dessert option that’s perfect for any time of the year. With its simple ingredients, easy preparation, and impressive results, it’s a great choice for both beginners and seasoned cooks. Don’t be afraid to experiment with different spices and toppings to make the recipe your own, and enjoy the process of creating something truly special with minimal effort. Whether you’re serving a crowd or just looking for a cozy night in, these baked pears are sure to hit the spot.
Easy Baked Pears Recipe
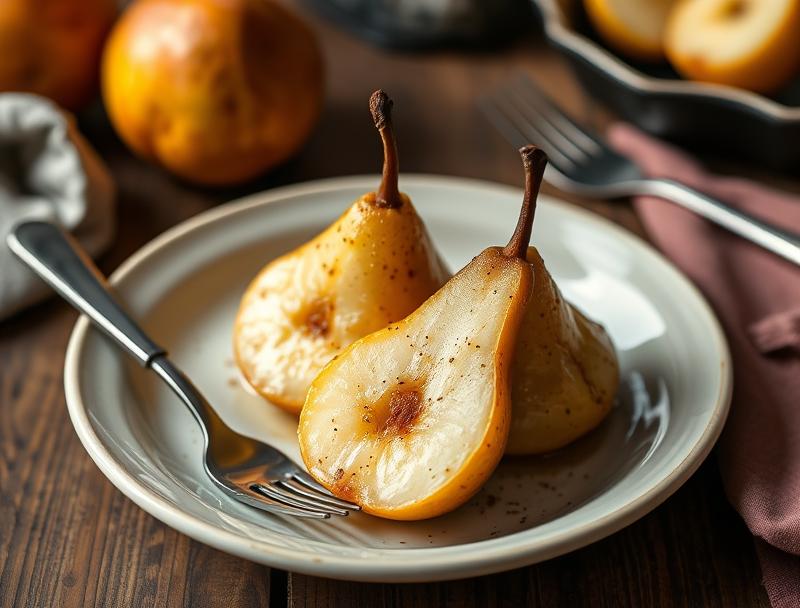
A simple and delicious dessert made by baking pears with honey, sugar, and spices, perfect for any occasion.
🥘 Ingredients
👩🍳 Instructions
-
1Preheat the oven to 375°F (190°C).
-
2Prepare the pears by washing, halving, and coring them.
-
3Mix the honey, brown sugar, cinnamon, nutmeg, and salt in a bowl. Add the melted butter and mix until smooth.
-
4Place the pear halves in a baking dish, cut side up, and spoon the honey and spice mixture over them. Pour the water into the baking dish and bake for 25-30 minutes or until the pears are tender.