Cheese Ball Recipe
Introduction
Welcome to the world of effortless entertaining with our delectable Cheese Ball Recipe! This dish is a perfect blend of ease, flavor, and creativity, all coming together with ingredients you likely have in your pantry. Imagine a delicious, creamy cheese mixture, perfectly balanced with herbs and spices, shaped into a beautiful ball that’s sure to be the centerpiece of any gathering. Whether you’re planning a cozy night in with family, a festive party, or just a quick snack, this cheese ball recipe is your go-to solution. It’s incredibly simple, requiring minimal preparation time, and the best part? It’s highly customizable to your taste preferences, making it a versatile dish for any occasion.
Why This Works
- Flavor balance and ingredient accessibility: Our cheese ball recipe strikes the perfect balance between creamy, tangy, and savory, using ingredients that are easily found in most supermarkets.
- Ease of preparation: With a preparation time of just a few minutes, this recipe is perfect for last-minute gatherings or when you need a quick, impressive dish.
- Impressive results with minimal effort: Despite its simplicity, the cheese ball presents beautifully and tastes divine, making it an impressive addition to any table without requiring hours of labor.
Ingredients
- 1 (8 ounce) package cream cheese, softened
- 1/2 cup shredded cheddar cheese
- 1/4 cup chopped green onions (such as scallions)
- 1/4 cup chopped fresh parsley
- 1 tablespoon lemon juice
- 1/2 teaspoon garlic powder
- 1/2 teaspoon onion powder
- Salt and pepper, to taste
- 1/4 cup chopped pecans or walnuts (optional, for coating)
Instructions
- Step 1: In a large mixing bowl, combine the softened cream cheese, shredded cheddar cheese, chopped green onions, parsley, lemon juice, garlic powder, onion powder, salt, and pepper. Mix well until all the ingredients are fully incorporated and the mixture is smooth.
- Step 2: Taste the mixture and adjust the seasoning if necessary. You can add more lemon juice, salt, pepper, or any other ingredient to suit your taste.
- Step 3: Cover the bowl with plastic wrap and refrigerate the cheese mixture for at least 30 minutes to allow the flavors to meld together.
- Step 4: Once the mixture is chilled, use your hands to shape it into a ball. If the mixture is too sticky, you can wet your hands slightly with cold water to help shape it more easily.
- Step 5: If desired, roll the cheese ball in chopped nuts to coat. This adds a nice crunch and flavor contrast to the dish.
- Step 6: Place the cheese ball on a serving plate or platter. You can garnish it with additional parsley or chives for a pop of color.
- Step 7: Serve the cheese ball with crackers, chips, or vegetables. It’s also delicious on its own as a snack or appetizer.
Handy Tips
- For a lighter version, you can use reduced-fat cream cheese and cheddar cheese.
- Experiment with different types of cheese, such as mozzarella, feta, or goat cheese, to create unique flavor profiles.
- Consider adding diced bell peppers, jalapeños, or dried cranberries to the cheese mixture for added flavor and texture.
- Always use room temperature ingredients for easier mixing and a smoother cheese ball.
Heat Control
This recipe does not require any cooking, making it perfect for hot summer days or when you need a no-fuss dish. However, if you choose to serve the cheese ball with heated elements, such as toasted crackers or warm bread, ensure they are cooled slightly before serving to prevent the cheese from melting.
Crunch Factor
Achieving the right texture is key to a great cheese ball. The cream cheese and cheddar provide a smooth, creamy base, while the chopped nuts add a delightful crunch. You can adjust the amount of nuts or add other crunchy elements like chopped bacon or seeds to your liking.
Pro Kitchen Tricks
- Make the cheese ball ahead of time and store it in the refrigerator for up to 24 hours. This allows the flavors to meld together beautifully.
- Use a mixture of soft and hard cheeses for the best flavor and texture combination.
- Don’t overmix the cheese mixture, as this can make it too dense and lose its creamy texture.
Storage Tips
- Store the cheese ball in an airtight container in the refrigerator for up to 5 days.
- For longer storage, consider freezing the cheese ball. Wrap it tightly in plastic wrap or aluminum foil and place it in a freezer-safe bag. Frozen cheese balls can be stored for up to 2 months. Thaw in the refrigerator overnight before serving.
- When reheating, do so gently to prevent the cheese from melting or separating. Room temperature is usually the best serving temperature for cheese balls.
Gift Packaging Ideas
The cheese ball makes a wonderful gift, especially during the holiday season. Consider wrapping it in decorative plastic wrap or placing it in a small, decorative bowl. You can also add a bag of crackers or garnishes like fresh herbs or edible flowers to make it a complete gift. For a more rustic look, wrap the cheese ball in parchment paper and tie it with a ribbon or twine.
Flavor Variations
- Different spices: Add a pinch of cayenne pepper for a spicy kick, smoked paprika for a smoky flavor, or dried herbs like thyme or rosemary for an earthy note.
- Creative toppings: Instead of nuts, try rolling the cheese ball in dried cranberries, chopped fresh herbs, or even grated chocolate for a sweet and savory combination.
- Ingredient swaps: Replace the cheddar cheese with another hard cheese like Parmesan or Manchego, or use goat cheese for a tangier flavor.
Troubleshooting
- Texture problems: If the cheese ball is too soft, refrigerate it for a few hours to firm up. If it’s too hard, let it sit at room temperature for about 30 minutes to soften slightly.
- Ingredient replacements: Don’t have green onions? Use chopped regular onions or shallots instead. Out of lemon juice? Try using vinegar or another acidic ingredient to balance the flavors.
- Over/undercooking signs: Since this recipe doesn’t involve cooking, you don’t have to worry about overcooking. However, if you’re serving the cheese ball with heated items, ensure they’re not too hot to prevent melting the cheese.
FAQs
- Can I freeze it? Yes, the cheese ball can be frozen for up to 2 months. Wrap it tightly and thaw in the refrigerator when you’re ready to serve.
- Is it gluten-free? Yes, this recipe is naturally gluten-free, making it a great option for those with gluten intolerance or sensitivity.
- Can I double the recipe? Absolutely! Simply double all the ingredients and proceed with the instructions. Keep in mind that a larger cheese ball might require a bit more time to chill and set.
Conclusion
With its ease of preparation, versatility, and delicious flavor, the cheese ball is a recipe that’s sure to become a staple in your household. Whether you’re a seasoned chef or a beginner in the kitchen, this dish is perfect for any occasion. Feel free to experiment with different ingredients and flavors to make it your own, and don’t hesitate to share your creations with friends and family. The joy of cooking lies not just in the eating, but in the sharing and the love that goes into preparing a meal for others. So go ahead, give this cheese ball recipe a try, and enjoy the delight it brings to your table and your loved ones.
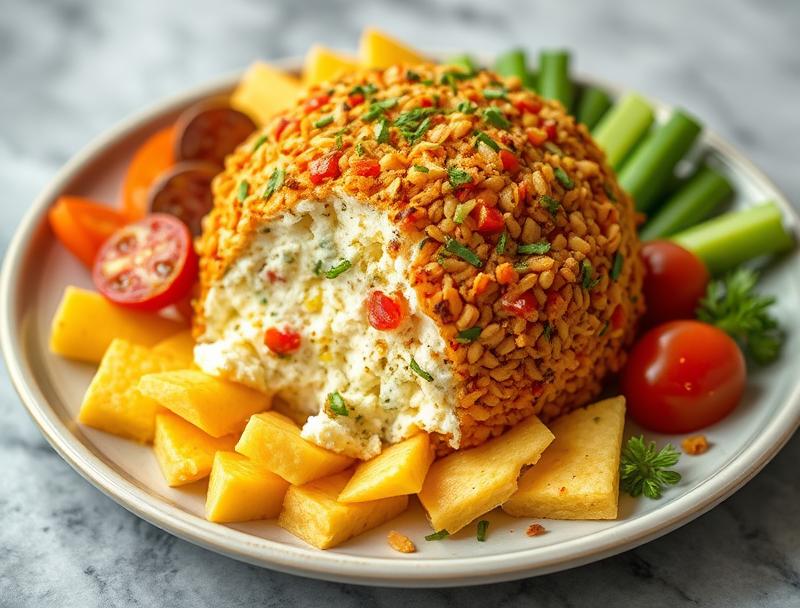
Cheese Ball Recipe
A simple and delicious cheese ball recipe perfect for any occasion, made with cream cheese, cheddar, and fresh herbs.
🥘 Ingredients
👩🍳 Instructions
-
1Combine cream cheese, cheddar cheese, green onions, parsley, lemon juice, garlic powder, onion powder, salt, and pepper in a bowl. Mix until smooth.
-
2Refrigerate the mixture for at least 30 minutes to allow flavors to meld.
-
3Shape the mixture into a ball. If too sticky, wet hands with cold water to help shape.
-
4If desired, roll the cheese ball in chopped nuts to coat.
-
5Serve with crackers, chips, or vegetables.