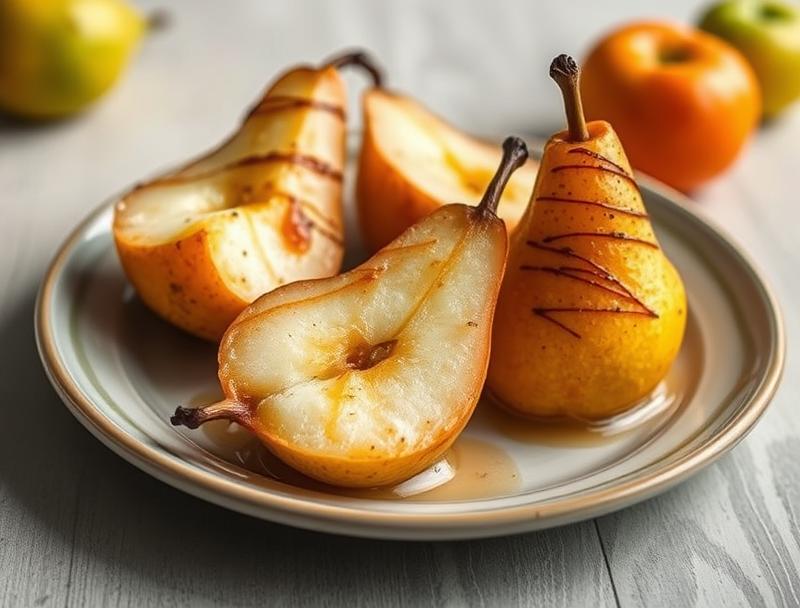
Easy Baked Pears Recipe
Introduction
Welcome to the world of effortless desserts with our Easy Baked Pears Recipe, a dish that embodies the perfect blend of simplicity, flavor, and creativity. Using everyday ingredients, this recipe transforms ordinary pears into an extraordinary dessert that is sure to impress your family and friends. The beauty of baked pears lies in their versatility and the ease with which they can be prepared, making them an ideal choice for both beginners and seasoned cooks. Whether you’re looking for a quick dessert to follow a weeknight meal or a show-stopping centerpiece for a dinner party, this recipe has you covered.
Why This Works
- Flavor balance and ingredient accessibility: This recipe strikes a perfect balance between sweet and spice, using ingredients that are readily available in most supermarkets.
- Ease of preparation: The steps are straightforward, requiring minimal preparation time and effort, making it perfect for busy days or special occasions.
- Impressive results with minimal effort: Despite its simplicity, the end result is visually appealing and packed with flavor, ensuring that you receive compliments without having to spend hours in the kitchen.
Ingredients
- 4 ripe but firm pears (any variety, though Bosc or Anjou work well)
- 1/4 cup brown sugar
- 2 tablespoons honey
- 1/2 teaspoon ground cinnamon
- 1/4 teaspoon ground nutmeg
- 1/4 teaspoon salt
- 2 tablespoons unsalted butter, melted
- 1/2 cup chopped walnuts or pecans (optional, for added crunch)
- 1 tablespoon fresh lemon juice
- Whipped cream or vanilla ice cream, for serving (optional)
Instructions
- Step 1: Preparation – Preheat your oven to 375°F (190°C). Rinse the pears, then peel, core, and halve them. In a small bowl, mix together the brown sugar, honey, cinnamon, nutmeg, and salt until well combined.
- Step 2: Mixing the Filling – In a separate bowl, mix the melted butter and lemon juice. Brush this mixture evenly over the pear halves, making sure they’re fully coated.
- Step 3: Baking the Pears – Place the pear halves in a baking dish, cut side up. Sprinkle the sugar and spice mixture evenly over the pears. If using nuts, sprinkle them on top for added crunch and flavor. Bake for about 25-30 minutes, or until the pears are tender when pierced with a fork.
- Step 4: Serving – Remove the pears from the oven and let them cool slightly. Serve warm, topped with whipped cream or a scoop of vanilla ice cream if desired. You can also serve them at room temperature or chilled, depending on your preference.
Handy Tips
- Choose the right pears: Firmer pears like Bosc or Anjou hold their shape better when baked. Avoid overly ripe pears as they may become too soft.
- Adjust the spice: Feel free to adjust the amount of cinnamon, nutmeg, or add other spices like ginger or cardamom to suit your taste preferences.
- Add a liquor twist: A tablespoon or two of liquor like bourbon, rum, or Grand Marnier can add a sophisticated flavor dimension to your baked pears.
Heat Control
The ideal temperature for baking pears is 375°F (190°C), and the baking time can vary from 20 to 35 minutes, depending on the pear variety and your desired level of tenderness. Keep an eye on them after 20 minutes, checking every 5 minutes thereafter, as the pears can quickly go from perfectly tender to overly soft.
Crunch Factor
The crunch factor in this recipe comes from the chopped nuts added on top of the pears before baking. If you prefer a softer texture, you can omit the nuts or replace them with a sprinkle of oatmeal for a different kind of crunch. The key to achieving the right texture is to not overbake the pears, ensuring they retain some of their natural firmness.
Pro Kitchen Tricks
- Use a variety of spices: Don’t limit yourself to cinnamon and nutmeg. Experiment with other warm spices like cloves, allspice, or star anise to create unique flavor profiles.
- Enhance with extracts: A teaspoon of vanilla or almond extract can add depth and complexity to your baked pears.
- Caramelize the sugar: For an extra caramelized top, broil the pears for 1-2 minutes after baking. Keep a close eye to prevent burning.
Storage Tips
- Leftovers can be stored in an airtight container in the refrigerator for up to 3 days. Reheat gently in the oven or microwave until warmed through.
- For longer storage, baked pears can be frozen for up to 2 months. Simply place them in a freezer-safe bag or container and thaw overnight in the fridge when you’re ready to serve.
Gift Packaging Ideas
Baked pears make a thoughtful and unique gift, especially when presented nicely. Consider placing a pair of baked pears in a decorative jar or container, topped with a layer of whipped cream or a sprinkle of cinnamon. Add a ribbon around the jar and a gift tag with the recipe and serving suggestions for a personal touch.
Flavor Variations
- Different spices: Try using ground ginger, cardamom, or a blend of chai spices for a unique twist.
- Creative toppings: In addition to whipped cream or ice cream, consider topping your baked pears with caramel sauce, chocolate shavings, or a dollop of crème fraîche.
- Ingredient swaps: Replace the brown sugar with maple syrup or honey for a different flavor profile. You can also use different types of nuts or seeds for added crunch.
Troubleshooting
- Texture problems: If your pears are too soft, they were likely overbaked. Aim for a tender but still slightly firm texture. If they’re too hard, they may not have baked long enough.
- Ingredient replacements: If you don’t have a particular spice or ingredient, feel free to omit it or substitute with something similar. The recipe is versatile and can withstand some experimentation.
- Over/undercooking signs: Keep an eye on your pears while they’re baking. They’re done when they’re tender and caramelized on top. If you notice them starting to brown too quickly, cover the dish with foil to prevent overbrowning.
FAQs
- Can I freeze it? Yes, baked pears can be frozen for up to 2 months. Simply thaw them overnight in the fridge when you’re ready to serve.
- Is it gluten-free? Yes, this recipe is naturally gluten-free, making it a great option for those with gluten intolerance or sensitivity.
- Can I double the recipe? Absolutely. Simply double all the ingredients and adjust the baking time as needed. Keep an eye on the pears to ensure they don’t overcook.
Conclusion
With its perfect balance of flavors and ease of preparation, the Easy Baked Pears Recipe is a must-try for anyone looking to elevate their dessert game without spending hours in the kitchen. Whether you’re a seasoned baker or a beginner, this recipe offers a versatile canvas for experimentation and creativity. So go ahead, give it a try, and enjoy the delightful simplicity and satisfying taste of baked pears. Don’t hesitate to share your own twists and favorite variations in the comments below, and happy baking!
Easy Baked Pears Recipe
A simple and delicious dessert recipe that transforms ordinary pears into a flavorful and impressive dish with minimal effort.
🥘 Ingredients
👩🍳 Instructions
-
1Preheat the oven to 375°F (190°C).
-
2Prepare the pears by peeling, coring, and halving them.
-
3Mix the brown sugar, honey, cinnamon, nutmeg, and salt in a small bowl.
-
4Brush the melted butter and lemon juice mixture over the pear halves.
-
5Sprinkle the sugar and spice mixture over the pears and add nuts if using.
-
6Bake for 25-30 minutes or until the pears are tender when pierced with a fork.
-
7Serve warm, topped with whipped cream or vanilla ice cream if desired.