Easy Baked Pears Recipe
Introduction
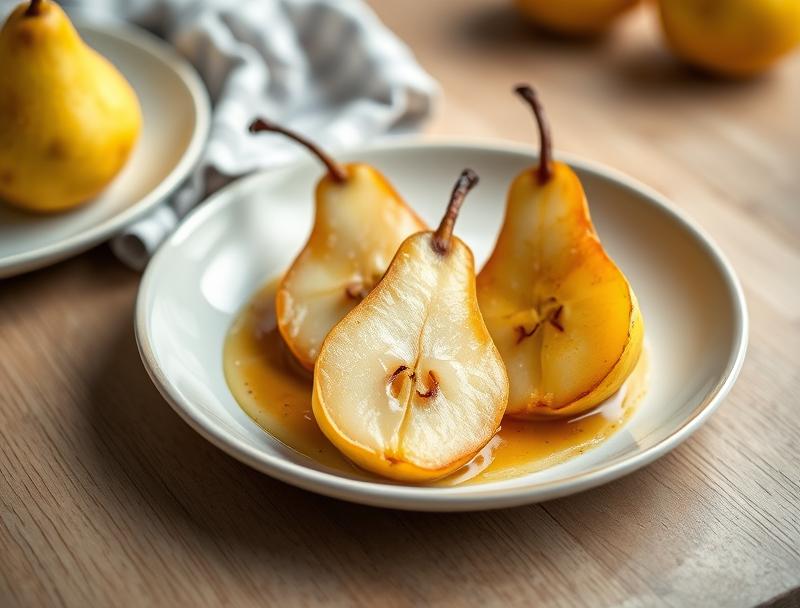
This Easy Baked Pears Recipe is a game-changer for anyone looking to impress their guests with a delicious, flavorful, and healthy dessert. Using everyday ingredients, you can create a masterpiece that will satisfy any sweet tooth. The beauty of this recipe lies in its simplicity, requiring minimal effort while yielding impressive results. With the combination of tender pears, sweet spices, and a hint of cinnamon, this dish is perfect for any occasion, whether it’s a family gathering, a dinner party, or a cozy night in.
Why This Works
- The balance of flavors in this recipe is key, with the natural sweetness of the pears complemented by the warmth of cinnamon and the subtle tang of lemon juice.
- The ease of preparation is another major advantage, as the ingredients are readily available and the instructions are straightforward.
- Despite the simplicity of the recipe, the results are truly impressive, making it an ideal choice for special occasions or everyday desserts.
Ingredients
- 4 ripe pears (any variety, such as Bartlett or Anjou), peeled, cored, and halved
- 1/4 cup granulated sugar
- 2 tablespoons honey
- 1 tablespoon fresh lemon juice
- 1/2 teaspoon ground cinnamon
- 1/4 teaspoon ground nutmeg
- 1/4 teaspoon salt
- 1/4 cup chopped fresh ginger (optional)
- 1/4 cup chopped pecans or walnuts (optional)
- 1 tablespoon unsalted butter, melted
Instructions
- Step 1: Preheat and Prepare Preheat your oven to 375°F (190°C). In a small bowl, mix together the granulated sugar, honey, lemon juice, cinnamon, nutmeg, and salt until well combined.
- Step 2: Prepare the Pears Place the pear halves in a baking dish, cut side up. Brush the melted butter over the pears, then sprinkle the sugar and spice mixture evenly over each pear half.
- Step 3: Add Optional Toppings If using, sprinkle the chopped ginger and nuts over the pears.
- Step 4: Bake and Serve Bake the pears in the preheated oven for 25-30 minutes, or until they’re tender and caramelized. Remove from the oven and let cool for a few minutes before serving. You can serve the pears warm or at room temperature, garnished with additional cinnamon or nuts if desired.
Handy Tips
- Choose ripe but firm pears for the best results, as they’ll hold their shape during baking.
- Don’t overbake the pears, as they can become mushy and lose their texture.
- Experiment with different spices, such as nutmeg or cardamom, to create unique flavor combinations.
Heat Control
To achieve the perfect texture, bake the pears at 375°F (190°C) for 25-30 minutes, or until they’re tender when pierced with a fork. Keep an eye on the pears during the last 10 minutes of baking, as the cooking time may vary depending on the ripeness and variety of the pears.
Crunch Factor
The combination of tender pears and crunchy nuts (if using) creates a delightful texture contrast in this dish. To enhance the crunch factor, sprinkle the nuts over the pears during the last 10 minutes of baking, allowing them to toast and become fragrant.
Pro Kitchen Tricks
- To prevent the pears from browning too quickly, cover the baking dish with foil during the first 15 minutes of baking.
- Use a variety of pear types to create a colorful and visually appealing dessert.
- Experiment with different flavor combinations, such as adding a splash of vanilla extract or a pinch of salt, to create a unique twist on the recipe.
Storage Tips
- Store leftover baked pears in an airtight container in the refrigerator for up to 3 days.
- Reheat the pears in the oven or microwave until warmed through, or serve at room temperature.
- Freeze the baked pears for up to 2 months, then thaw and reheat as needed.
Gift Packaging Ideas
Consider packaging the baked pears in a decorative jar or container, topped with a sprinkle of cinnamon and a few fresh ginger slices. You can also wrap individual pear halves in plastic wrap or aluminum foil and tie with a ribbon, making for a lovely and thoughtful gift.
Flavor Variations
- Try using different types of sugar, such as brown sugar or turbinado sugar, to create a unique flavor profile.
- Experiment with various spices, such as ground ginger or ground cloves, to add depth and warmth to the dish.
- Swap out the nuts for a different type, such as almonds or hazelnuts, to create a distinct texture and flavor combination.
Troubleshooting
- If the pears become too brown during baking, cover the dish with foil to prevent further browning.
- If the pears are not tender after the recommended baking time, continue to bake in 5-minute increments until they reach the desired texture.
- If the sugar and spice mixture becomes too crunchy, try reducing the baking time or covering the dish with foil to prevent over-browning.
FAQs
- Can I freeze the baked pears? Yes, you can freeze the baked pears for up to 2 months, then thaw and reheat as needed.
- Is this recipe gluten-free? Yes, this recipe is gluten-free, making it a great option for those with dietary restrictions.
- Can I double the recipe? Yes, you can easily double the recipe to serve a larger crowd, simply adjust the baking time as needed to ensure the pears are tender and caramelized.
Conclusion
This Easy Baked Pears Recipe is a versatile and delicious dessert that’s perfect for any occasion. With its simple ingredients and straightforward instructions, you can create a stunning and flavorful dish that’s sure to impress your guests. Feel free to experiment with different flavor combinations and ingredients to make the recipe your own, and don’t hesitate to reach out if you have any questions or need further guidance. Happy baking!
Easy Baked Pears Recipe
A simple and delicious dessert recipe featuring baked pears with a hint of cinnamon and sugar.
🥘 Ingredients
👩🍳 Instructions
-
1Preheat the oven to 375°F (190°C).
-
2Prepare the pears by peeling, coring, and halving them.
-
3Mix together the sugar, honey, lemon juice, cinnamon, nutmeg, and salt in a small bowl.
-
4Brush the melted butter over the pears, then sprinkle the sugar and spice mixture evenly over each pear half.
-
5Bake the pears in the preheated oven for 25-30 minutes, or until they're tender and caramelized.