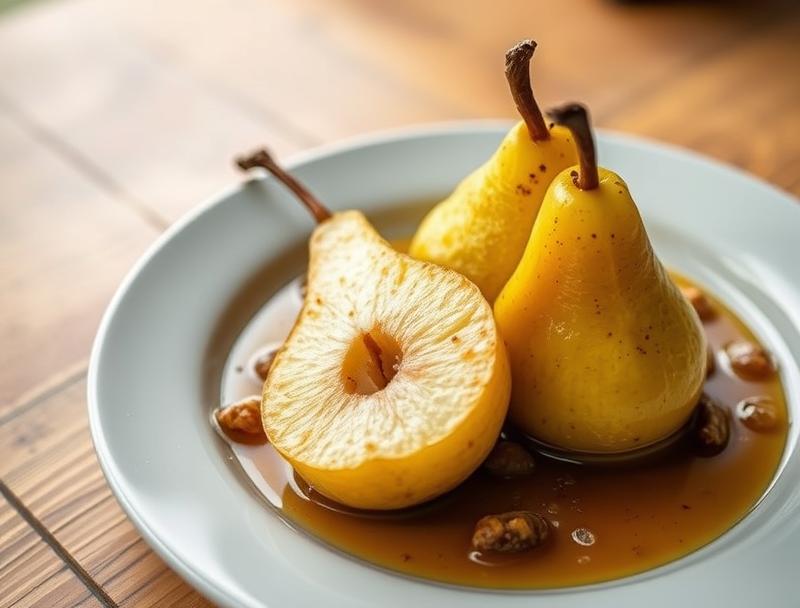
Easy Baked Pears Recipe
Introduction
Imagine sinking your teeth into a warm, tender pear, infused with the sweetness of honey and the depth of cinnamon, all achieved with minimal effort and using everyday ingredients. This easy baked pears recipe is a masterclass in simplicity and flavor, perfect for a cozy night in or as a delightful dessert for your next dinner party. The beauty of this recipe lies in its accessibility and versatility, allowing you to experiment with a variety of spices and toppings to suit your taste. Whether you’re a seasoned chef or a culinary novice, this recipe is sure to impress with its ease of preparation and the impressive results it yields.
Why This Works
- Flavor balance and ingredient accessibility: The combination of honey, cinnamon, and lemon juice creates a harmonious balance of sweet and tangy flavors, while the ingredients are easily found in most kitchens.
- Ease of preparation: With a preparation time of mere minutes, this recipe is perfect for those looking for a quick dessert solution without compromising on taste.
- Impressive results with minimal effort: The end result is a beautifully presented and deliciously flavored dessert that looks like it took hours to prepare, making it perfect for special occasions or unexpected guests.
Ingredients
- 4 ripe pears (any variety, though firmer pears like Bartlett or Anjou work best)
- 2 tablespoons honey
- 1 tablespoon brown sugar
- 1/2 teaspoon ground cinnamon
- 1/4 teaspoon ground nutmeg
- 1/4 teaspoon salt
- 2 tablespoons unsalted butter, melted
- 1 tablespoon fresh lemon juice
- 1/4 cup chopped walnuts or pecans (optional, for added crunch)
- Whipped cream or vanilla ice cream, for serving (optional)
Instructions
- Step 1: Preparation – Preheat your oven to 375°F (190°C). Rinse the pears, then peel, core, and halve them. In a small bowl, mix together the honey, brown sugar, cinnamon, nutmeg, and salt until well combined.
- Step 2: Mixing the Glaze – Add the melted butter and lemon juice to the honey mixture and stir until smooth. This glaze will be brushed over the pears during baking.
- Step 3: Baking the Pears – Place the pear halves in a baking dish, cut side up. Brush the honey glaze evenly over each pear half, making sure they are all coated. If using nuts, sprinkle them over the pears at this stage.
- Step 4: Final Touches – Bake the pears for about 25-30 minutes, or until they are tender when pierced with a fork. The exact baking time may vary depending on the pear variety and your desired level of doneness. Remove the pears from the oven and let them cool slightly. Serve warm, topped with whipped cream or a scoop of vanilla ice cream if desired.
Handy Tips
- For an extra caramelized glaze, increase the oven temperature to broil (high) for the last 2-3 minutes of baking. Keep a close eye to prevent burning.
- Consider using different spices like ground ginger or cardamom to give your pears a unique flavor twist.
- If you prefer a crisper pear, bake them for a shorter time. For a softer pear, bake a few minutes longer.
Heat Control
The ideal temperature for baking pears is 375°F (190°C), and the baking time should be around 25-30 minutes, depending on the ripeness and variety of the pears. Pears are done when they are tender and easily pierced with a fork. If you’re unsure, it’s better to err on the side of undercooking, as pears will continue to soften after being removed from the oven.
Crunch Factor
The addition of chopped nuts like walnuts or pecans provides a delightful crunch to the soft, baked pears. If you prefer a different texture, you could also sprinkle a pinch of granola or even crushed cookies over the pears before baking for added crunch.
Pro Kitchen Tricks
- To enhance the flavor, use high-quality ingredients like pure honey and real vanilla ice cream.
- For a professional finish, arrange the baked pears on a serving platter or individual plates and garnish with fresh herbs like mint or rosemary.
- Experiment with different types of sugar, like turbinado or muscovado, for unique flavor profiles.
Storage Tips
- Baked pears are best served fresh but can be stored in the refrigerator for up to 24 hours. Reheat them in the oven at a low temperature (around 300°F or 150°C) for a few minutes until warmed through.
- For longer storage, pears can be baked ahead of time and frozen. Simply thaw overnight in the fridge and reheat as needed.
- Use airtight containers to store leftover pears, keeping them away from strong-smelling foods as pears can absorb odors easily.
Gift Packaging Ideas
If you’re considering gifting your baked pears, they can be beautifully presented in glass jars or containers, topped with a decorative lid or ribbon. Include a packet of whipped cream or a pint of vanilla ice cream for a complete dessert gift. For a more rustic look, wrap individual pears in parchment paper and tie with twine, perfect for a homemade gift basket.
Flavor Variations
- Different spices: Try adding a pinch of ground cloves, allspice, or star anise to the honey glaze for unique flavor twists.
- Creative toppings: In addition to nuts, consider topping your baked pears with chocolate shavings, caramel sauce, or even a dollop of yogurt for added flavor and texture.
- Ingredient swaps: Replace honey with maple syrup or agave nectar for a different sweetness profile. You can also use other types of sugar or sweeteners like stevia for a lower-calorie option.
Troubleshooting
- Texture problems: If your pears are too hard, they may not have been ripe enough. If they’re too soft, they might have been overbaked. Adjust baking time based on the pear’s initial ripeness and your desired texture.
- Ingredient replacements: If you don’t have honey, you can substitute it with another sweetener, though keep in mind the flavor will be slightly different. For spice substitutions, refer to the flavor variations section.
- Over/undercooking signs: Pears that are undercooked will be hard and resist piercing with a fork. Overcooked pears will be mushy and possibly caramelized too much. Adjust baking time as needed for the perfect texture.
FAQs
- Can I freeze it? Yes, baked pears can be frozen for up to 3 months. Simply thaw and reheat when needed.
- Is it gluten-free? This recipe is naturally gluten-free, making it suitable for those with gluten intolerance or sensitivity.
- Can I double the recipe? Absolutely, this recipe can be easily doubled or tripled to serve larger crowds. Just ensure you have enough baking dishes and adjust the baking time slightly if necessary.
Conclusion
This easy baked pears recipe is a testament to the magic that can happen in the kitchen with just a few, simple ingredients. Whether you’re a fan of sweet treats, looking for a healthy dessert option, or simply wanting to impress your guests, this recipe has something for everyone. Feel free to experiment with the flavors and toppings to make it your own, and don’t hesitate to share your creations with friends and family. The joy of cooking lies not just in the eating, but in the sharing and the love that goes into every dish. So go ahead, bake some pears, and spread a little joy today!
Easy Baked Pears Recipe
A simple and delicious dessert made by baking pears in a honey and spice glaze, perfect for any occasion.
🥘 Ingredients
👩🍳 Instructions
-
1Preheat oven to 375°F (190°C).
-
2Prepare the pears by peeling, coring, and halving them.
-
3Mix the honey glaze ingredients and brush over the pears.
-
4Bake the pears for 25-30 minutes or until tender.