Coconut Cake Recipe
Introduction
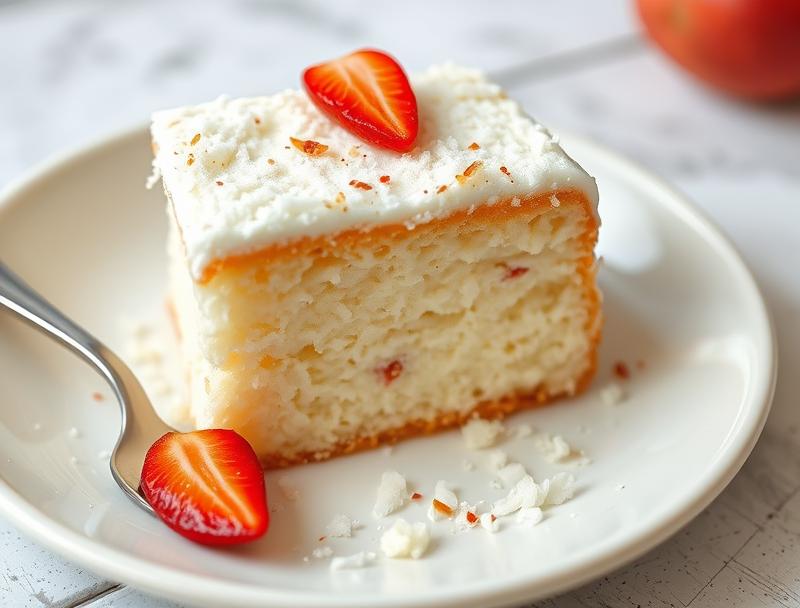
This coconut cake recipe is a masterpiece of ease, flavor, and creativity, all combining to bring you a dessert that’s as delicious as it is impressive. Using everyday ingredients and a straightforward method, you can create a moist, flavorful cake that’s perfect for any occasion, from birthdays to weddings. The best part? It’s incredibly easy to make, requiring minimal effort for maximum results. Whether you’re a seasoned baker or just starting out, this recipe is sure to become a favorite.
Why This Works
- The balance of flavors, with the sweetness of the cake, the richness of the butter, and the freshness of the coconut, creates a truly unique and addictive taste experience.
- The accessibility of the ingredients means you can make this cake whenever you want, without having to search for obscure or hard-to-find components.
- The ease of preparation, coupled with the impressive results, makes this recipe perfect for both beginner bakers and those looking to impress at a dinner party.
Ingredients
- 2 cups all-purpose flour
- 1 teaspoon baking powder
- 1 teaspoon salt
- 1 cup unsalted butter, softened
- 1 3/4 cups granulated sugar
- 3 large eggs, at room temperature
- 2 teaspoons pure vanilla extract
- 1 cup unsweetened shredded coconut
- 1 cup buttermilk
- Confectioners’ sugar, for dusting
Instructions
- Step 1: Preheat your oven to 350°F (180°C). Prepare two 9-inch (23cm) round cake pans by greasing them and lining the bottoms with parchment paper.
- Step 2: In a medium bowl, whisk together the flour, baking powder, and salt. Set aside.
- Step 3: In a large mixing bowl, use an electric mixer to beat the butter until it’s creamy, about 2 minutes. Gradually add the sugar and continue beating until light and fluffy, about 3 minutes.
- Step 4: Beat in the eggs one at a time, allowing each egg to fully incorporate before adding the next. Beat in the vanilla extract.
- Step 5: With the mixer on low speed, gradually add the flour mixture to the wet ingredients in three parts, alternating with the buttermilk, beginning and ending with the flour mixture. Beat just until combined.
- Step 6: Stir in the unsweetened shredded coconut.
- Step 7: Divide the batter evenly between the prepared pans and smooth the tops.
- Step 8: Bake for 30-35 minutes or until a toothpick inserted into the center of each cake comes out clean.
- Step 9: Allow the cakes to cool in the pans for 10 minutes before transferring them to a wire rack to cool completely.
- Step 10: Once the cakes are cool, you can frost and decorate them as desired. A simple dusting of confectioners’ sugar or a creamy coconut buttercream frosting are excellent choices.
Handy Tips
- Make sure to use room temperature ingredients for the best results.
- Don’t overmix the batter, as this can result in a dense cake.
- If you don’t have buttermilk, you can make a substitute by mixing 1 cup of milk with 1 tablespoon of white vinegar or lemon juice. Let it sit for 5-10 minutes before using.
Heat Control
For this recipe, it’s crucial to maintain the correct oven temperature. An oven that’s too hot can cause the outside of the cake to burn before the inside is fully cooked, while an oven that’s too cool can result in a cake that’s undercooked or takes too long to bake. Use an oven thermometer to ensure your oven is at the correct temperature.
Crunch Factor
The addition of unsweetened shredded coconut gives this cake a delightful texture, with a subtle crunch from the coconut. To enhance this, you can toast the coconut in a 350°F oven for 5-7 minutes, or until lightly browned, before adding it to the batter. This step is optional but adds a deeper flavor and crunchier texture.
Pro Kitchen Tricks
- To ensure your cakes are perfectly level, bake them for the recommended time, then check for doneness. If they’re not done, continue to bake in 2-minute increments until a toothpick inserted into the center comes out clean.
- For a professional finish, once your cakes are completely cool, you can use a serrated knife to level them, if necessary, before frosting and decorating.
Storage Tips
- Store your coconut cake at room temperature for up to 3 days. It’s best to keep it in an airtight container to maintain freshness.
- For longer storage, you can refrigerate the cake for up to 5 days or freeze it for up to 2 months. When freezing, it’s best to freeze the layers separately before frosting and decorating.
- To freeze, wrap the cooled cake layers tightly in plastic wrap or aluminum foil and place them in a freezer-safe bag. Thaw frozen layers overnight in the refrigerator before frosting and serving.
Gift Packaging Ideas
This coconut cake makes a wonderful gift for friends, family, or coworkers. Consider decorating the cake with a simple yet elegant design, then place it in a sturdy, decorative cake box or on a cake stand wrapped in clear plastic or cellophane. You can also add a personal touch with a handwritten note or a small gift, like a bag of gourmet coffee or a box of chocolates.
Flavor Variations
- 🌟 Add a teaspoon of coconut extract to the batter for an intensified coconut flavor.
- 🌟 Use toasted pecans or walnuts for added texture and flavor contrast.
- 🌟 Substitute the granulated sugar with brown sugar for a deeper, richer flavor.
Troubleshooting
- Texture problems: If your cake turns out too dense, it may be due to overmixing the batter. Try mixing the ingredients just until they come together for a lighter texture.
- Ingredient replacements: If you don’t have buttermilk, you can make a substitute as mentioned earlier. For other ingredients, try to find the closest match in terms of flavor and texture.
- Over/undercooking signs: An overcooked cake will be dry and possibly cracked on top. An undercooked cake will be wet and may sink in the center. Adjust your baking time as needed to achieve the perfect doneness.
FAQs
- Can I freeze it? Yes, you can freeze the cake layers for up to 2 months. It’s best to freeze them separately before frosting and decorating.
- Is it gluten-free? No, this recipe uses all-purpose flour and is not gluten-free. However, you can experiment with gluten-free flours to create a gluten-free version.
- Can I double the recipe? Yes, you can double the recipe to make a larger cake. Just remember to adjust the baking time accordingly, as larger cakes take longer to bake through.
Conclusion
With this coconut cake recipe, you’re not just making a dessert; you’re creating an experience. The combination of moist cake, rich flavors, and the simplicity of preparation makes it perfect for any occasion. Whether you’re a fan of coconut or just looking to try something new, this cake is sure to impress. So go ahead, get baking, and share your creations with friends and family. Happy baking!
Coconut Cake Recipe
A moist and flavorful coconut cake recipe, perfect for any occasion.
🥘 Ingredients
👩🍳 Instructions
-
1Preheat the oven to 350°F (180°C).
-
2Prepare two 9-inch round cake pans by greasing them and lining the bottoms with parchment paper.
-
3Whisk together the flour, baking powder, and salt. Set aside.
-
4Beat the butter until creamy, then gradually add the sugar and continue beating until light and fluffy.
-
5Beat in the eggs one at a time, allowing each egg to fully incorporate before adding the next. Beat in the vanilla extract.
-
6With the mixer on low speed, gradually add the flour mixture to the wet ingredients in three parts, alternating with the buttermilk, beginning and ending with the flour mixture. Beat just until combined.
-
7Stir in the unsweetened shredded coconut.
-
8Divide the batter evenly between the prepared pans and smooth the tops.
-
9Bake for 30-35 minutes or until a toothpick inserted into the center of each cake comes out clean.
-
10Allow the cakes to cool in the pans for 10 minutes before transferring them to a wire rack to cool completely.
-
11Once the cakes are cool, you can frost and decorate them as desired.